Wednesday, July 25, 2012

RV Remodel 7

Girls can use power tools too! 

Quality family time is when your 10 year old daughter ask her dad if she can use the drill to unscrew something!  Dad put her to work removing "eyebrows"? above the doorways. 

I think she did a great job and did it all by herself!


I'm thinking Girl M need a cordless screwdriver for her birthday!

Dad showing Girl M how to re-install the refrigerator vent.

"Dad, I got this!"


Dear hubby told be to blog about the one piece we DIDN'T have to buy for the RV!  It's a roof vent cap we had laying around, he thinks that's recycling......


Skylight vent in front living area repaired with metal and caulked.  No more leaks from this one.  Now he has two more to go!

Kitchen window re-installed & butyl tape trimmed. 

 Furnace vents replaced with metal backs and re-installed.  Butyl tape not trimmed yet.

Porch light that needs replaced above kitchen window.  Testing to see if it even works.  Nope, add that to the list of things to get.

This is the vinyl tile sample we bought to see how we like it.  Boy F. calls this color "camouflage".  I think it will not show clay and dirt too bad.  I'm liking the color now.


Next on our project list is to:
Replace exterior lights-bought & ready to install
Replace antenna-ordered & on it's way
Reseal corner seams
Reset 6 more windows & 1 more door, reinstall eyebrows
Do a leak test on the roof......

Then we'll be able to start inside on the exciting stuff!

Until next time.....

Bonnie


Tuesday, July 24, 2012

RV Remodel 6

Our next project is fixing the bathroom area floor.  We are not going to put a shower/tub back in.  We have decided that since the hunt camp has a nice shower that we would just put in the toilet and a sink.  I think I would rather have the leg room.  Also, if we camp in it at State parks we shower in their bath houses anyways.

The plumbing under the tub.

Floor under tub fixed.

 Wheel well on kitchen wall boxed in.  The wall is sturdy now!  Boy F. calls this black water tank vent pipe on the right a stripper pole..... Boys!

Framing almost complete!  Looking from rear bedroom to living area in front.  Hubby is progressing right along!

Looking from kitchen area to rear.

Antenna removed, new one ordered, ready to be installed when it arrives.

Roof vent in living area.  Removing!

Dear hubby and I are arguing over these aluminum window awnings.  I LOVE them.  He HATES them.  He wants to eventually repaint the trailer and I think that we should just repaint the awning to match......  We'll see who wins this battle!

Until next time.....

Bonnie

RV Remodel 5

Our next project was to work on the hot water area that was under the rear bed.  We noticed some damage along the bottom wall framing.  Luckily it was the only damage on that side! 

We had to remove the hot water heater to get a good look at what was happening.

 Water heater removed.  Damage to flooring and bottom of framing.


Peeling up the linolium to see how far the damage on the floor was.  Luckily this was the only part of the floor that had any damage.

Jig saw out cutting up the rotten floor.

Our dog Lulu likes the new opening in the side.  It's just her size!

 Under the bed where the electrical panel is and the hot water heater.

Flooring cut away ready to put in a new piece of plywood.  We are also moving the electrical box so that you can also reach it from the outside storage under the bed.
Flooring patched and new bottom framing done!  Another side down!

Dear hubby had enough time before going to work to replace some of the rafters over our bed.  He gets alot done in a little bit of time!

Until next time....

Bonnie


RV Remodel 4

Removing the outer aluminum skin this is the damage we found.  We thought it would be easier to repair with the skin off.


Now the next picture is what happens when you take off the outer skin and the rotten wood framing under the window completely falls apart.  The whole camper shifted to the right.  I had to hold it up until dear hubby could think of how to straighten it back up!

Now there is no picture of me pushing this camper for a million hours while he rigged up this contraption to hold it upright. 


Contraption pulling the camper back into position!  Whew! that thing was HEAVY!

Dear hubby had to hurry and frame in the front before he could loosen his contraption.

There's that invaluable jack doing some heavy lifting again!  Front area cleaned up and ready to reframe.


Our friend "Jack" holding up the roof.

We're making sure it's plumb before we let the contraption loose.  I look pretty rough because I just spent the last hour holding up the side of a travel trailer!

Front area framing finished!  Now that is beautiful work! 

I'm pretty tired today so until next time.......

Bonnie

RV Remodel 3

Everyday I see a little more progress on what we are tearing out and what we need to redo.  I have a million and one ideas in my head.  I can't wait to get going on some rebuilding soon. 

We still have to repair all the leaks including the roof and do a rain test to see if we got them all before even starting on the inside work.

Framing around the front door.  Isn't it beautiful!

 Framing along the bottom of the wall.  It was rotted from front to back.  It's pretty neat to see how this was made.  But sad to see the lack of care it received.  It has good bones just a little wear and age.

Holding the roof up while repairing the frame bottom.

Repair along the bottom of the framing at back door.  This huge jack was invaluable!

Framing along the kitchen window wall.  That's looking great!

 Framing along the kitchen wall, this is the refrigerator area with the pantry and wardrobe behind it.  Nice and sturdy now!

The front area to the right on the front door.  This window had been replaced.  Nice window, sucky job on sealing.  Going to frame it in now!

That's a lot of work in a few days now.  I see progress!

Until next time.....

Bonnie

Rv Remodel 2

 More demolition going in the camper.  Boy F. is taking down the cabinets over the dinette.  They were in decent condition but they would not have matched any of the other cabinets so out they went!

 Who's supervising and who's doing all the work?

 Trailer load 1 of two that we burned.  This stuff is heavy!


Damage along the front corners.  Buckled paneling from water damage. 

Water damage along the celing.  Found this skylight vent in the bathroom under a piece of paneling.  Leaked too.  We are going to have to remake some of the roof trusses.

What have we gotton ourselves into?

Kitchen window with water damage on the wall framing.

I just keep telling myself there isn't anything else left to find that is damaged.  We'll see......

Until next time.....

Bonnie

Making Memories-The RV Remodel

We just purchased a 1985 Fleetwood Resort 28' Travel Trailer.  I knew it was going to need some work.  I could see water damage above the rear bed and along the front corners.  As with any project it will always take twice as long and cost twice as much as what you think it should.

I have always wanted to gut out and redo a RV.  I'm not too sure my dear husband was on the same page as me but he's a good sport and dove right in too.


We bought the trailer from an elderly woman for $500.  At the time I think it was a good deal, put once we started looking for leaks, I think it should have been more like $200.  Once we got it home we started taking off the paneling, and pulling the insulation away to look for wet spots.  Demolition is like a sick drug, once you start taking it apart you just want to keep taking it apart!  I love Demolition! 

The trailer was not bug infested or stinky but I'm glad we gutted it because there was alot more going on than we first thought.

Vent above the bed had leaked.  Rotten roof rafters.  Windows in good condition.  This is above our bed.  We are going to remove the vent and patch the roof.  I do not want it leaking onto the bed.

Once you start looking for leaks you just never know what you're going to find.  The hunt started with just pulling off a panel of the paneling here and there, then looking under the insulation.
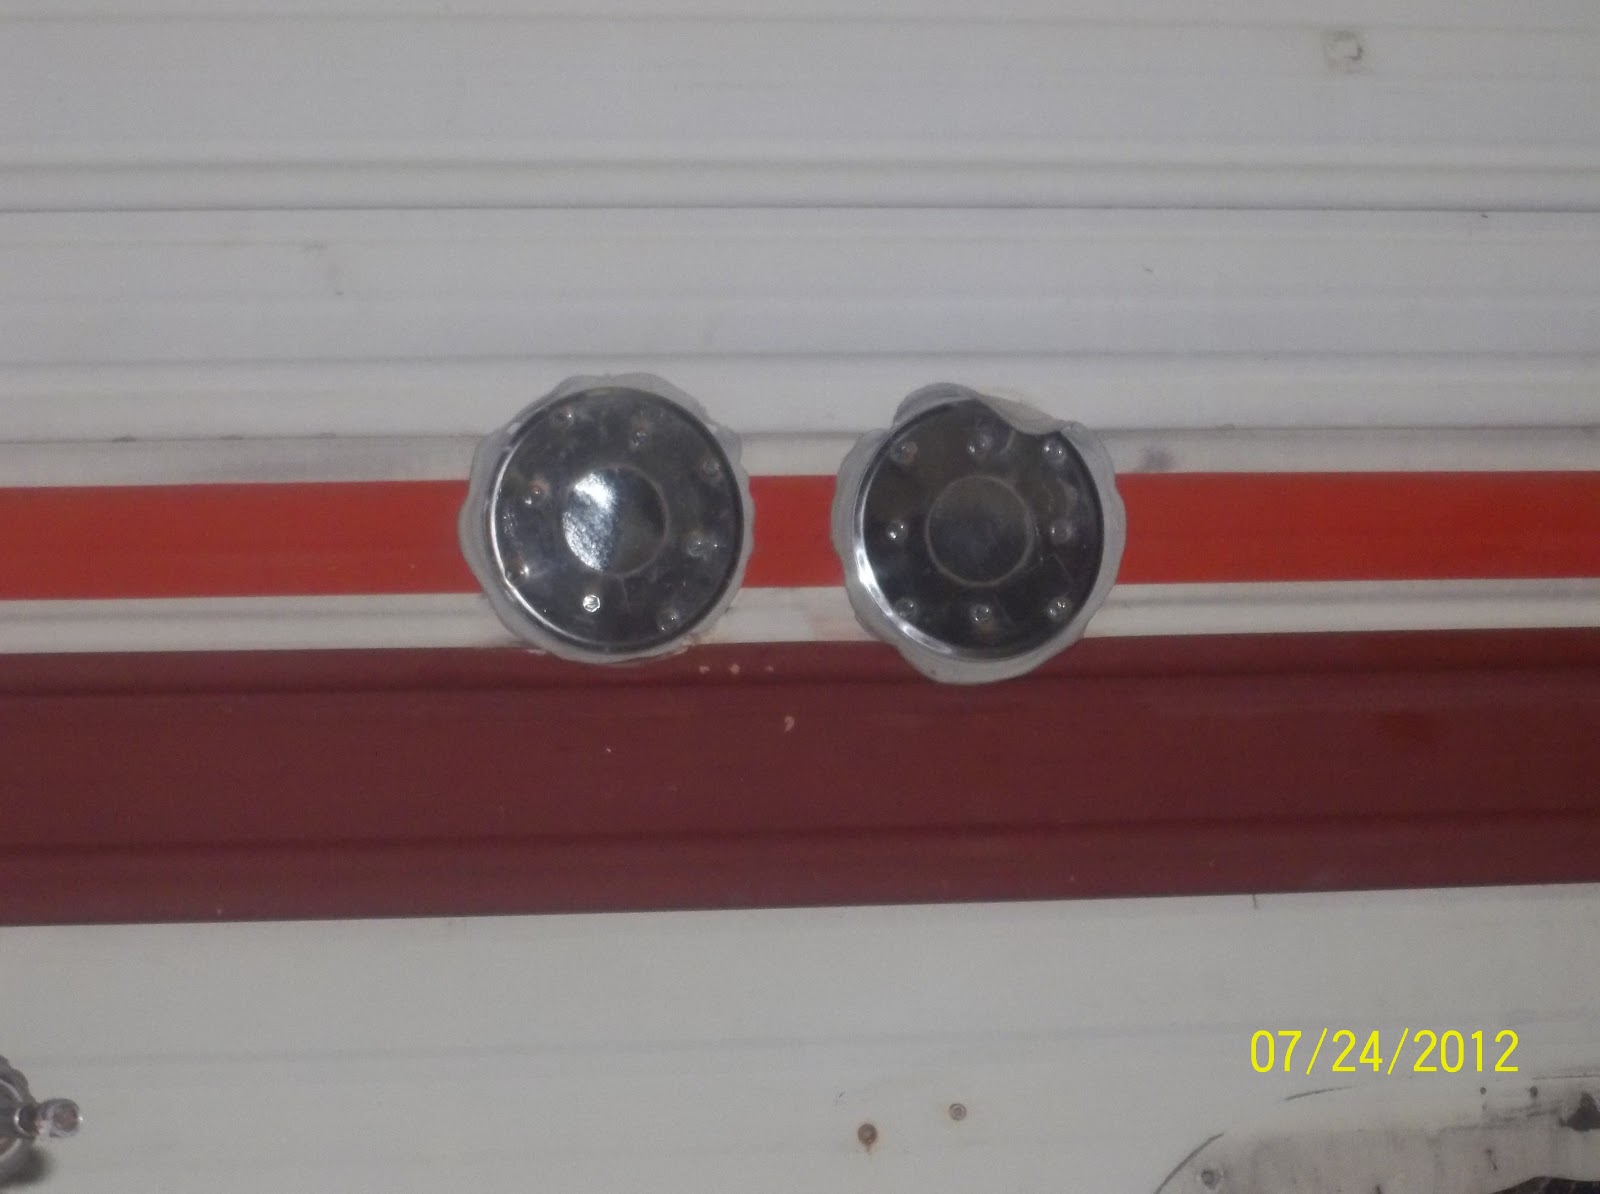
The running lights along the rear leaked, along with the corners.


The front living area of the trailer.  It came with a full size bed that we decided to keep since it looked brand new.  The refrigerator doors on the right.  I HATE wood paneling!  Water damage on the front right area.  Multiple pieces of paneling over water damage and rot.
The kitchen area.  The wallpaper is held up by tacks.  The wood behind was black with rot.  I HATE wood paneling.  The window above the sink was held up by one screw! You could push the whole wall out away from the floor.

The micro bathtub!  I really mean MICRO bathrub, it was 16"x23".  Includes two free rolls of TP!  This is a beautiful shade of harvest yellow.  I think this bathroom is so small that if I were to sit on the toilet I might get splinters in my butt from the fake paneling!
The only decent wall.  The dinette before the demo!


The refrigerator before the demo. It went to the trash too! 


Looking down the hall from the bedroom.  I really like the setup they had bathroom and dinette on the left and kitchen and storage on the right. I really hate fake wood paneling.
More demo in the kitchen, pantry and wardrobe.

Another picture of the micro bathroom before demo.

 
Demo and water damage to the kitchen wall.


Kitchen demo.  Counters gone, sink gone, oven gone.  Water damage along the whole wall.

Dear hubby taking down the pantry. 

Another shelf stapled, nailed, glued and screwed in.

Demo along the left wall.  Dear hubby working on the wardrobe and Boy F breaking wood.

Looking down the hallway from the living area.  Entire left side demolished. 

Left wheelwell where refrigerator and furnace went. 

Another look at the bathroom  The counter top has water damage and the cabinets fall apart in your hands.

 
Boy F. taking the dinette apart.  He says all the screws were stripped.  He's going to need Dad's help.


Hallway wall to bathroom gone! More room to work.

Why would you lift the lid?

 
We found a vent above the bathtub.  Didn't know it was there.  It's going to go too.  We think since there is a nice size window in the bathroom already we don't need another possible leaky area in the roof.
Still working on the dinette.  There in a converter box under the dinette seat. 

More fake wood paneling.  Boy F. says that the vent pipe behind him is our stripper pole.....?  Boys!

The AC!  The only thing that still works!  We used it for a while since we live in Florida and it only a million degrees here.  But it melted the plug in at the barn so we had to resort to fans.

The guys looking into the bathroom to see what the sledgehammer next.


Counters gone in the bathroom.  Toilet out and the tub is next!


Sweet girl M, coming to see if Dad and Brother need a glass of iced tea!


Boy F. working on demo in the bathroom.

 
Looking down the demo hallway from the bedroom to the living area.  Kitchen on the right, dinette and bathroom on the left.

Bathroom floor.


I have orded a total of 5 rolls of butyl tape for windows, doors, exterior lights, and anything else we put a screw in.  I think they got alot of work done.  But I do know there is alot more to go.  I will post more demo and repair pictures soon.

Until next time......

Bonnie